Authenticate Kubernetes Users with Windows Active Directory Server
Note
This guide was replaced by: Overview of LDAP Servers
This guide describes how to authenticate users of the Kubernetes API via a remote Windows Active Directory server, using the oidc-auth-apps application.
Configure the kube-apiserver
Configure the Kubernetes cluster with a few extra parameters for the kube-apiserver. You can do this during bootstrap or after installation.
Configure as part of bootstrap
Add the following items to localhost.yml during bootstrap:
apiserver_oidc:
  client_id: stx-oidc-client-app
  issuer_url: https://<oam-floating-ip>:30556/dex
  username_claim: email
  groups_claim: groups
The username_claim and groups_claim parameter values can vary for
different user and group configurations within your Windows Active Directory
server.
Configure post-install
Execute the following commands to add the OIDC parameters to the kube-apiserver:
system service-parameter-add kubernetes kube_apiserver oidc_client_id=value
system service-parameter-add kubernetes kube_apiserver oidc_groups_claim=value
system service-parameter-add kubernetes kube_apiserver oidc_issuer_url=value
system service-parameter-add kubernetes kube_apiserver oidc_username_claim=value
system service-parameter-apply kubernetes
Configure oidc-auth-apps application
The oidc-auth-apps application is a system managed application that is packaged in the ISO and uploaded by default. To use the oidc-auth-apps application for authentication, you must first configure and deploy the oidc-auth-apps application as described below.
These commands assume the cert and key pem files for creating these secrets
are in /home/sysadmin/ssl/.
Create a secret with the certificate and key (
local-dex.tls) to be used by the oidc-auth-apps as well as a secret with the CA that signed this certificate (dex-client-secret) for the client. The certificate should be signed by a CA trusted by the system. If the certificate is signed by a CA that is not trusted by default, you can make the system trust the CA by specifying it during bootstrap by specifying ssl_ca_cert inlocalhost.yml, or throughsystem certificate-install -m ssl_ca ...after bootstrap.kubectl create secret tls local-dex.tls --cert=ssl/dex-cert.pem --key=ssl/dex-key.pem -n kube-system kubectl create secret generic dex-client-secret --from-file=/home/sysadmin/ssl/dex-ca.pem -n kube-system
Create a Kubernetes secret wadcert with the CA’s certificate that signed the Active Directory’s certificate using the following command:
kubectl create secret generic wadcert --from-file=ssl/AD_CA.cer -n kube-system
Specify user overrides for oidc-auth-apps.
system helm-override-update oidc-auth-apps dex kube-system --values /home/sysadmin/dex-overrides.yaml
The only mandatory section is the “connectors” section, which will vary for different Windows Active Directory deployments. Refer to the upstream dex documentation for more details: https://github.com/dexidp/dex/blob/master/Documentation/connectors/ldap.md
Here is an example
dex-overrides.yamlfile:config: expiry: idTokens: "10h" connectors: - type: ldap name: OpenLDAP id: ldap config: host: pv-windows-acti.cumulus.wrs.com:636 rootCA: /etc/ssl/certs/adcert/AD_CA.cer insecureNoSSL: false insecureSkipVerify: false bindDN: cn=Administrator,cn=Users,dc=cumulus,dc=wrs,dc=com bindPW: St8rlingXCloud* usernamePrompt: Username userSearch: baseDN: ou=Users,ou=Titanium,dc=cumulus,dc=wrs,dc=com filter: "(objectClass=user)" username: sAMAccountName idAttr: sAMAccountName emailAttr: sAMAccountName nameAttr: displayName groupSearch: baseDN: ou=Users,ou=Titanium,dc=corp,dc=cumulus,dc=wrs,dc=com filter: "(objectClass=group)" userAttr: DN groupAttr: member nameAttr: cn extraVolumes: - name: certdir secret: secretName: wadcert extraVolumeMounts: - name: certdir mountPath: /etc/ssl/certs/adcert
Apply oidc-auth-apps:
system application-apply oidc-auth-apps
Obtain authentication token
You can get the authentication token using the oidc-auth CLI or using a
browser.
Use oidc-auth CLI
The oidc-auth CLI retrieves the ID token from Windows Active Directory using
the OIDC client, and dex, and updates the Kubernetes credentials for the user in
the kubectl config file.
On controller-0, oidc-auth is installed as part of the base installation,
and is ready to use.
On a remote host with kubectl and helm client installed on the host, perform the following required setup:
Install the Python
mechanizemodule:sudo pip2 install mechanize
Get the
oidc-authscript from the public StarlingX mirror. For example,https://mirror.starlingx.windriver.com/mirror/starlingx/master/centos/latest_docker_image_build/outputs/remote-cli/
After setup is complete, run the oidc-auth script to authenticate and update
user credentials in the kubectl config file with the retrieved token.
oidc-auth -c <OAM ip address> -u testuser
Password:
Login succeeded.
Updating kubectl config ...
User testuser set.
Switch to the context for this user:
kubectl config use-context testuser@mystxcluster
Run a kubectl command to ensure the token works:
kubectl get pods --all-namespaces
Use browser
From a browser, enter the following:
https://oam-floating-ip-address:30555
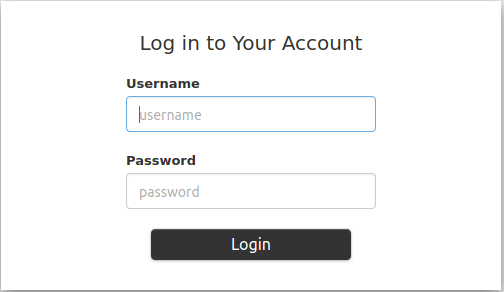
In the dialog box, enter your username, password and click Login.
An ID token is displayed as shown below:
ID Token:

eyJhbGciOiJSUzI1NiIsImtpZCI6IjkwYTcyYmIwZTRjNTJhZDhiNGYxMmYxNzc3NTVmNDdmODc5M2ZkYTAifQ.eyJpc3MiOiJodHRwczovLzEwLjEwLjEwLjM6MzA1NTYvZGV4Iiwic3ViIjoiQ2dkbmQyRnBibVZ6RWdSc1pHRnciLCJhdWQiOiJzdHgtb2lkYy1jbGllbnQtYXBwIiwiZXhwIjoxNTgwODQ4NTkzLCJpYXQiOjE1ODA3NjIxOTMsImF0X2hhc2giOiJNU0YtNDBpOWVuM1QyVjdUMWdSZW5RIiwiZW1haWwiOiJnd2FpbmVzIiwiZW1haWxfdmVyaWZpZWQiOnRydWUsIm5hbWUiOiJHcmVnb3J5IEEuIFdhaW5lcyJ9.oNIabUhd5wx3tFCIuewtzsbYfx1OsrGXtEUEPL0l5Y944WE2c1HP6YUHWxvYTMw1_Ldl-jx-koiYbiE8Eztgy9anfJqclUFa6xlxP666Z7AYxndsULylqzfT0dvySaddIEEYDffx7aH6g7q2PKZjMHFierRyqmCu8WTPRSNy3NymLmQaGGjUmFHqbvpEBgg_ytpsDgbRIpk1EbyP63l79hBNlRvcffTRLi3LYYRaJLgSbx2tha43OX5rKxylF_GrzZHaqxxT6MjIHKHagUrcqa054RwPWUHKyV26ErkMg6gN5uyMm462UtnW7jJucYrWBpbaWaj0U0OTWv_1NnKlJw

Access Token:

jwcj46v3vmumpixr54wbyrstf

Claims:

{
  "iss": "https://10.10.10.3:30556/dex",
  "sub": "Cgdnd2FpbmVzEgRsZGFw",
  "aud": "stx-oidc-client-app",
  "exp": 1580848593,
  "iat": 1580762193,
  "at_hash": "MSF-40i9en3T2V7T1gRenQ",
  "email": "testuser",
  "email_verified": true,
  "groups": [
    "billingDeptGroup",
    "managerGroup"
    ],
  "name": "testuser"
}
Set Kubernetes credentials with the above ID token:
~(keystone_admin)]$ TOKEN=<ID token string>
~(keystone_admin)]$ kubectl config setcredentials testuser --token $TOKEN
Switch to the context for this user:
~(keystone_admin)]$ kubectl config use-context testuser@mystxcluster
Run the command
kubectl get pods --all-namespaces.
This command should be successful because authentication is complete.
