Appendix W: Ceph iSCSI
Overview
This section contains information on the usage of Ceph-backed iSCSI targets in a Charmed Ceph environment. See the ceph-iscsi charm README for essential information.
VMware integration
Ceph can be used to back iSCSI targets for VMware initiators.
Begin by accessing the VMware admin web UI.
Note
These instructions were written using VMware ESXi 6.7.0.
Accessing the WMware web UI.
Create a Ceph pool
If desired, create a Ceph pool to back the VMware targets with the ceph-mon
charm’s create-pool action. To create one called ‘vmware-iscsi’:
juju run-action --wait ceph-mon/0 create-pool name=vmware-iscsi
Enable the initiator
From the web UI select the Adapters tab in the Storage context. Click
Configure iSCSI and enable iSCSI.
Take a note of the initiator’s name, also called its IQN (iSCSI Qualified
Name). Here the IQN we’ll use is
iqn.1998-01.com.vmware:node-gadomski-6a5e962a.
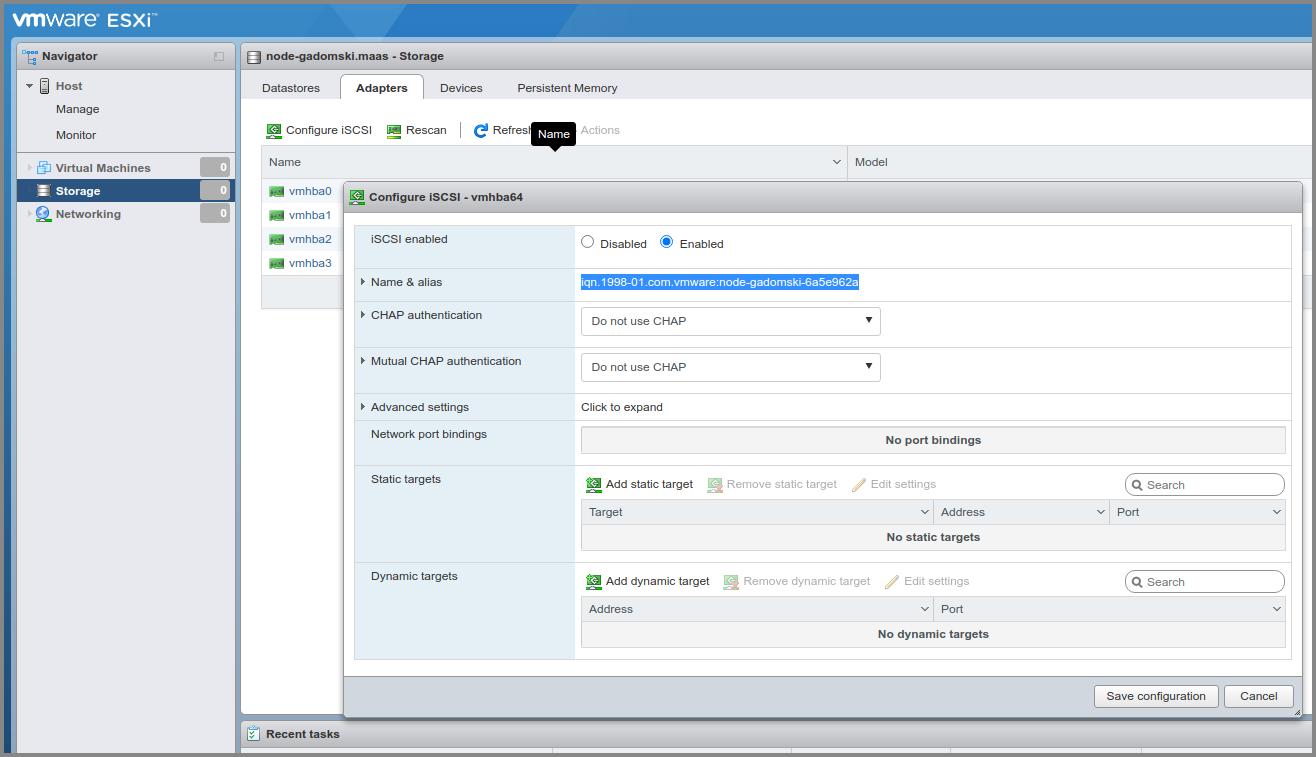
Determining the IQN for the initiator.
Create an iSCSI target
With the create-target action create a target for VMware to use. Use the
pool that may have been created previously (such as ‘vmware-iscsi’):
juju run-action --wait ceph-iscsi/0 create-target \
   client-initiatorname=iqn.1998-01.com.vmware:node-gadomski-6a5e962a \
   client-username=vmwareclient \
   client-password=12to16characters \
   image-size=5G \
   image-name=disk-1 \
   pool-name=vmware-iscsi
Note
VMware imposes a policy on credentials. The username should be more than eight characters and the password between twelve and sixteen characters.
Add a target to VMware
Follow the Ceph iSCSI gateway for VMware documentation to use the new
target. Use the (CHAP) username and password passed to the create-target
action.
Note
At the time of writing, the redundant task of setting the credentials via
the ESX CLI is still a necessity. This will require you to enable SSH under
Manage > Services > TSM-SSH > Actions (Start).
When finished, under the Devices tab you should see the created target. To
make more devices available to VMware simply create more targets (use a
different image name and optionally a different image size). You may need to
Rescan and Refresh for the new devices to appear.
Clicking on one of the target devices will show its details:
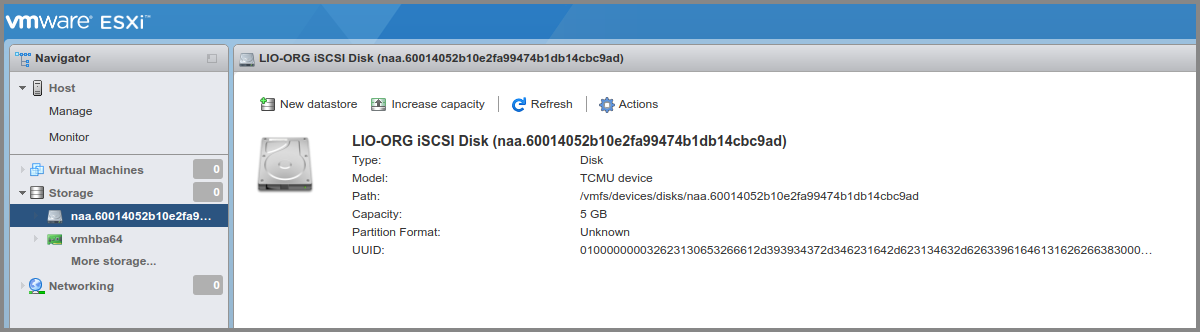
Inspecting target device details.
